The Secret to Perfectly Crispy Baked Chicken Tenders

Let’s be honest, who doesn’t love crispy chicken tenders? They’re a classic for a reason – easy to make, loved by kids and adults alike, and incredibly versatile. But let’s face it, the deep-fried version isn’t always the healthiest option. That’s why I’m so excited to share my recipe for Crispy Baked Chicken Tenders that deliver all the satisfying crunch without the extra grease. This isn’t just about baking chicken; it’s about achieving that perfect balance of juicy tenderness inside and irresistible crispiness outside. We’re going to dive deep into the techniques and ingredients that make all the difference.
Why Bake Instead of Fry?
Before we get started, let’s quickly address why baking these tenders is such a great choice.
* **Healthier Option:** Baking significantly reduces the amount of fat compared to frying.
* **Easier Cleanup:** No messy oil splatters to deal with!
* **Even Cooking:** Baking ensures the chicken cooks evenly without burning.
* **Still Delicious:** With the right techniques, you can achieve that satisfying crunch you crave.
Ingredients You’ll Need
Here’s what you’ll need to create these magical, crispy chicken tenders. Don’t worry, most of these ingredients are probably already in your pantry!
* **Chicken Tenderloins:** About 1.5-2 pounds. Make sure they’re trimmed of any excess fat or tendons.
* **Panko Bread Crumbs:** This is the *key* to the ultimate crispiness. Panko is lighter and flakier than regular breadcrumbs, creating a superior crunch.
* **All-Purpose Flour:** For the first coating, helping the egg mixture adhere better.
* **Eggs:** 2 large eggs, lightly beaten.
* **Milk or Buttermilk:** A splash of milk or buttermilk will make the egg mixture even more luscious and help the breadcrumbs stick. Buttermilk adds a slight tang that’s absolutely delicious.
* **Grated Parmesan Cheese:** Adds a wonderful nutty flavor and helps with browning.
* **Garlic Powder:** For that savory, irresistible aroma.
* **Onion Powder:** Complements the garlic powder beautifully.
* **Paprika:** Adds a touch of color and a subtle smoky flavor.
* **Dried Italian Herbs:** A blend of oregano, basil, and thyme for that classic Italian flavor.
* **Salt and Black Pepper:** To taste. Don’t be shy! Seasoning is crucial.
* **Olive Oil or Cooking Spray:** For coating the baking sheet to prevent sticking.
Step-by-Step Instructions: Let’s Get Cooking!
Alright, my friend, let’s get down to business! Follow these steps carefully, and I promise you’ll be rewarded with the crispiest, most delicious baked chicken tenders you’ve ever tasted.
1. **Preheat your oven to 400°F (200°C).** This high temperature is essential for achieving that golden-brown crisp.
2. **Prepare your baking sheet.** Line a large baking sheet with parchment paper or lightly grease it with olive oil or cooking spray. Parchment paper makes cleanup a breeze!
3. **Set up your breading station.** This is where the magic happens! You’ll need three shallow dishes:
* **Dish 1:** All-purpose flour, seasoned with a pinch of salt and pepper.
* **Dish 2:** Eggs, lightly beaten with milk or buttermilk, and a pinch of salt and pepper. The mixture should be slightly frothy.
* **Dish 3:** Panko bread crumbs, grated Parmesan cheese, garlic powder, onion powder, paprika, dried Italian herbs, salt, and pepper. Mix well to combine. This is where all the flavor and crispiness come from!
4. **Dredge the chicken tenderloins.**
* **First:** Dip each chicken tenderloin in the flour, making sure it’s completely coated. Shake off any excess flour. This helps the egg mixture adhere better.
* **Second:** Dip the floured tenderloin in the egg mixture, ensuring it’s fully submerged. Let any excess egg drip off.
* **Third:** Transfer the egg-coated tenderloin to the panko breadcrumb mixture. Press the tenderloin firmly into the breadcrumbs, making sure it’s completely coated on all sides. Really pack those breadcrumbs on there!
5. **Place the breaded chicken tenderloins on the prepared baking sheet.** Arrange them in a single layer, making sure they’re not touching each other. This allows for even cooking and maximum crispiness.
6. **Lightly spray the breaded chicken tenderloins with olive oil or cooking spray.** This helps the breadcrumbs brown beautifully and adds another layer of crispiness. Don’t skip this step!
7. **Bake for 18-22 minutes,** or until the chicken is cooked through and the breadcrumbs are golden brown and crispy. The internal temperature of the chicken should reach 165°F (74°C). Use a meat thermometer to be sure!
8. **Let the chicken tenders rest for a few minutes before serving.** This allows the juices to redistribute, resulting in even more tender and flavorful chicken.
Success Tips: Guaranteeing Crispy Perfection
Okay, my friend, here are my golden rules for achieving 100% crispy chicken tender success!
* **Don’t overcrowd the baking sheet:** This is crucial! Overcrowding will steam the chicken instead of baking it, resulting in soggy tenders. Use two baking sheets if necessary.
* **Use Panko breadcrumbs:** Seriously, this is non-negotiable! Panko is the key to that signature crispy texture.
* **Don’t skip the spraying of oil:** This helps the breadcrumbs brown and crisp up beautifully.
* **Make sure the chicken is fully coated in breadcrumbs:** Press the breadcrumbs firmly onto the chicken to ensure they adhere properly.
* **Check the internal temperature:** Overcooked chicken is dry and tough. Use a meat thermometer to ensure the chicken is cooked to perfection.
Variations and Adaptations: Spice It Up!
Want to add your own personal touch? Here are a few ideas to get you started:
* **Spice it up:** Add a pinch of cayenne pepper or red pepper flakes to the breadcrumb mixture for a little heat.
* **Add some zest:** Grate some lemon or lime zest into the breadcrumb mixture for a bright, citrusy flavor.
* **Go gluten-free:** Use gluten-free breadcrumbs and gluten-free flour.
* **Try different cheeses:** Experiment with different types of grated cheese, such as Asiago or Romano.
* **Add some herbs:** Experiment with different herbs, such as fresh parsley, cilantro, or dill.
Serving Suggestions: The Perfect Pairings
These Crispy Baked Chicken Tenders are incredibly versatile and can be served in so many ways! Here are a few of my favorite serving suggestions:
* **Classic with dipping sauces:** Serve with your favorite dipping sauces, such as ranch dressing, honey mustard, BBQ sauce, or ketchup.
* **Chicken tender salads:** Top a fresh salad with sliced chicken tenders for a protein-packed meal.
* **Chicken tender wraps:** Wrap the chicken tenders in tortillas with lettuce, tomato, and your favorite sauce for a quick and easy lunch or dinner. Consider this a simpler version of Cheesy Garlic Chicken Wraps, focusing on that crispy chicken texture.
* **Chicken tender sandwiches:** Serve the chicken tenders on buns with lettuce, tomato, and your favorite condiments.
* **Chicken tender pasta:** Add the chicken tenders to your favorite pasta dish for a complete and satisfying meal. You could even serve them alongside Garlic Butter Chicken Bites & Creamy Pasta for a truly decadent meal.
* **Chicken tender tacos:** Use the chicken tenders as a filling for tacos, topped with your favorite taco toppings.
Make-Ahead and Storage Instructions
These Crispy Baked Chicken Tenders are perfect for meal prepping!
* **Make-Ahead:** You can bread the chicken tenders ahead of time and store them in the refrigerator for up to 24 hours. Just make sure to cover them tightly to prevent them from drying out.
* **Storage:** Store leftover chicken tenders in an airtight container in the refrigerator for up to 3-4 days.
* **Reheating:** Reheat the chicken tenders in the oven at 350°F (175°C) for about 10-15 minutes, or until heated through. You can also reheat them in the air fryer for a few minutes. Avoid microwaving them, as they will become soggy.
* **Freezing:** Freeze the breaded chicken tenders on a baking sheet until solid, then transfer them to a freezer-safe bag or container. They can be stored in the freezer for up to 2-3 months. When ready to bake, bake them from frozen, adding a few extra minutes to the cooking time.
Recipe
**Crispy Baked Chicken Tenders**
**Yields:** 6 servings
**Prep Time:** 20 minutes
**Cook Time:** 20 minutes
**Ingredients:**
* 1.5-2 pounds chicken tenderloins, trimmed
* 1 cup all-purpose flour
* 2 large eggs, lightly beaten
* 1/4 cup milk or buttermilk
* 2 cups Panko bread crumbs
* 1/2 cup grated Parmesan cheese
* 1 teaspoon garlic powder
* 1 teaspoon onion powder
* 1 teaspoon paprika
* 1 teaspoon dried Italian herbs
* Salt and black pepper to taste
* Olive oil or cooking spray
**Equipment:**
* 3 shallow dishes
* Large baking sheet
* Parchment paper (optional)
* Meat thermometer
**Instructions:**
1. Preheat oven to 400°F (200°C). Line a baking sheet with parchment paper or lightly grease it.
2. Set up your breading station: Dish 1: Flour with salt and pepper. Dish 2: Eggs with milk/buttermilk, salt, and pepper. Dish 3: Panko, Parmesan, garlic powder, onion powder, paprika, Italian herbs, salt, and pepper.
3. Dredge chicken: Flour, then egg, then panko mixture. Press firmly to coat.
4. Place breaded chicken on the baking sheet in a single layer.
5. Lightly spray with olive oil or cooking spray.
6. Bake for 18-22 minutes, or until golden brown and cooked through (165°F/74°C internal temperature).
7. Let rest for a few minutes before serving.
Nutritional Information (Approximate):
* Calories: 350-400 per serving (depending on serving size and ingredients used)
* Protein: 30-35 grams
* Fat: 15-20 grams
* Carbohydrates: 20-25 grams
Conclusion: Enjoy Your Crispy Creations!
There you have it, my friend! My foolproof recipe for Crispy Baked Chicken Tenders. I hope you enjoy making and eating these as much as I do. Remember, the key to success is in the details – using Panko breadcrumbs, not overcrowding the baking sheet, and lightly spraying with oil. With these tips in mind, you’re well on your way to creating the crispiest, most delicious baked chicken tenders you’ve ever tasted. Now go forth and conquer your kitchen! Happy cooking!
Why is baking the chicken tenders a healthier option than frying?
Baking significantly reduces the amount of fat compared to frying, making it a healthier choice.
Panko breadcrumbs are lighter and flakier than regular breadcrumbs, which creates a superior crunch when baked.
Can I prepare the chicken tenders ahead of time?
Yes, you can bread the chicken tenders ahead of time and store them in the refrigerator for up to 24 hours. Make sure to cover them tightly to prevent them from drying out.
What is the best way to reheat leftover chicken tenders to maintain their crispiness?
Reheat the chicken tenders in the oven at 350°F (175°C) for about 10-15 minutes, or until heated through. You can also reheat them in the air fryer for a few minutes. Avoid microwaving them, as they will become soggy.

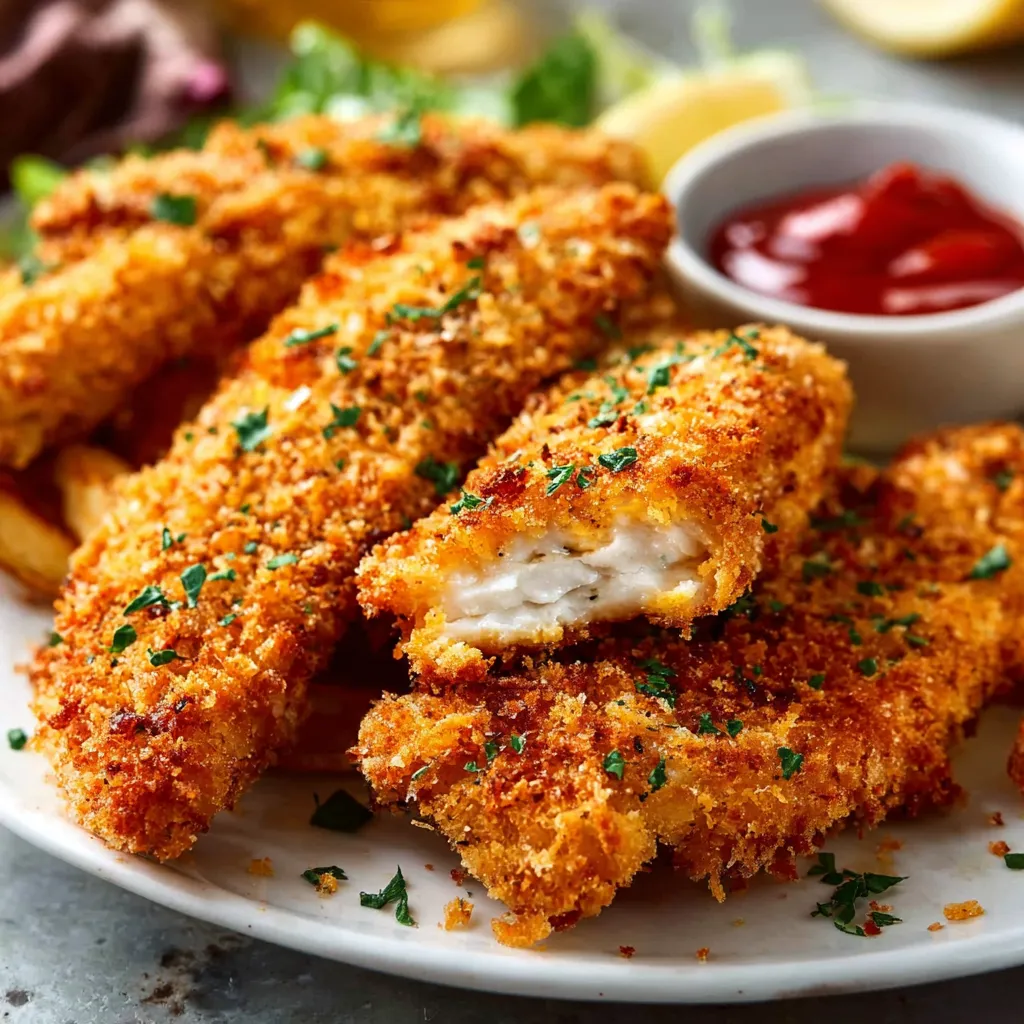
Perfectly Crispy Baked Chicken Tenders
![]()
Enjoy irresistibly crispy baked chicken tenders without the extra grease. This recipe delivers perfectly juicy and tender chicken with a golden-brown, crunchy coating, thanks to the use of panko breadcrumbs and a few simple techniques. Perfect for a quick and healthy weeknight meal or a crowd-pleasing appetizer.
- 1.5-2 pounds chicken tenderloins, trimmed
- 1 cup all-purpose flour
- 2 large eggs, lightly beaten
- ¼ cup milk or buttermilk
- 2 cups Panko bread crumbs
- ½ cup grated Parmesan cheese
- 1 teaspoon garlic powder
- 1 teaspoon onion powder
- 1 teaspoon paprika
- 1 teaspoon dried Italian herbs
- Salt to taste
- Black pepper to taste
- Olive oil or cooking spray
-
Preheat your oven to 400°F (200°C) and line a large baking sheet with parchment paper or lightly grease it with olive oil or cooking spray.
-
Set up your breading station with three shallow dishes. In the first dish, place the all-purpose flour and season with salt and pepper.
-
In the second dish, whisk together the eggs, milk or buttermilk, and a pinch of salt and pepper until lightly frothy.
-
In the third dish, combine the panko bread crumbs, grated Parmesan cheese, garlic powder, onion powder, paprika, dried Italian herbs, salt, and pepper. Mix well to ensure even distribution of flavors.
-
Dredge each chicken tenderloin in the flour, ensuring it’s completely coated. Shake off any excess flour.
-
Dip the floured tenderloin in the egg mixture, ensuring it’s fully submerged. Let any excess egg drip off.
-
Transfer the egg-coated tenderloin to the panko breadcrumb mixture. Press the tenderloin firmly into the breadcrumbs, making sure it’s completely coated on all sides.
-
Place the breaded chicken tenderloins on the prepared baking sheet in a single layer, ensuring they’re not touching each other.
-
Lightly spray the breaded chicken tenderloins with olive oil or cooking spray.
-
Bake for 18-22 minutes, or until the chicken is cooked through and the breadcrumbs are golden brown and crispy. The internal temperature of the chicken should reach 165°F (74°C).
-
Let the chicken tenders rest for a few minutes before serving.
For extra crispy tenders, ensure the chicken is completely dry before breading. Don’t overcrowd the baking sheet; use two if necessary. Reheat leftovers in the oven or air fryer to maintain crispiness. To spice things up, add a pinch of cayenne pepper to the breadcrumb mixture. Store leftover chicken tenders in an airtight container in the refrigerator for up to 3-4 days. They can also be frozen for up to 2-3 months; bake from frozen, adding a few extra minutes to the cooking time.